Showing posts with label Cinematography. Show all posts
Showing posts with label Cinematography. Show all posts
Monday, 5 June 2017

Schematics
Below is the lighting schematics for my short film. This was quite fun to make and I enjoy using Abobe Illustrator.


Lighting exercise HMI experements
This experiment was very interesting as this was the first time using an HMI light.
HMI: Hydrargyrum medium-arc iodide...The lamp operates by creating an electrical arc between two electrodes within the bulb that excites the pressurised mercury vapour and metal halides and provides a very high light output with greater efficiency than incandescent lighting unit.
With HMI bulbs, colour temperature varies significantly with lamp age. A new bulb generally will output at a colour temperature close to 15,000 K during its first few hours. As the bulb ages, the colour temperature reaches its nominal value of around 5600 K or 6000 K.

The HMI light is very bright and has a colour temperature of 10,000ºK when new and 5600ºK after a period of time.
The HMI we used was between 5600º and 6000ºK so that is what we set the colour temperature at.
This light produced a very artificial looking light that we had to diffuse with silks and flags. After a while, we managed to start getting setups that were looking good. but I would only use a light like this while shooting in a green screen studio to replicate sunlight or positioned outside a house window on a cloudy day (or night time). Personally, I would rather use the natural sunlight and use diffs or flags to control it.


One thing I learnt was about exposing for the face: we used spot metering for this and that is a reflective based metering system. when exposing for the face using a reflective meting system expose exactly what the exposure is telling you to. however if using incidental metering the zone that the face should be (zone 6 for caucasian) should be exposed for one stop above what is read on the light meter.
Lighting exercise - soft light
This was an experiment with a big silk over a 5Kw tungsten bulb as the Key light and the Kino Flow Diva as a fill light useing a

2:1 Hard Light (a little better than 1:1 hard light)


During this experiment, we tried placing the silk at different distances from the light and the subject to see what effect it would make on the light quality,
1:1 Hard Light

2:1 Hard Light (a little better than 1:1 hard light)

Silk Far (creating a very soft effect to fill light)

Silk Close (This still left some shadows and was not as soft as we would have liked it)

Silk Far and Flozier Diffuser on Fill (this was one of the best setups in my opinion)

Thursday, 1 June 2017
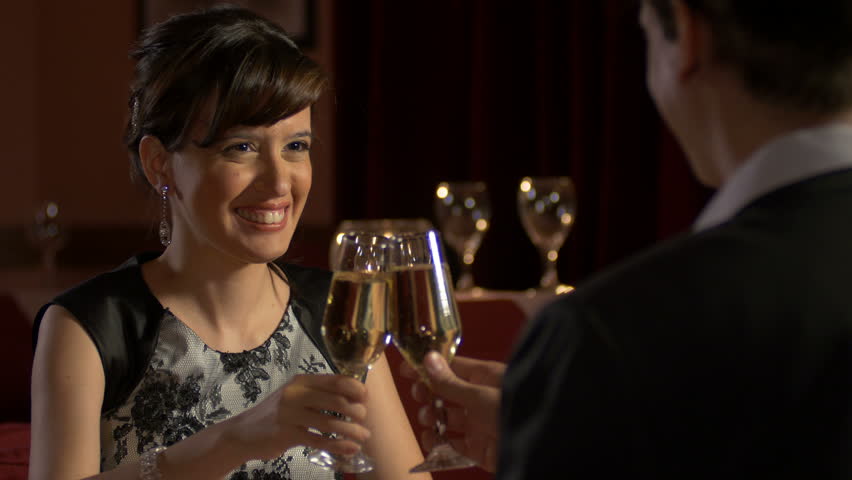
Lighting Exercise - Firelight
This was a very interesting exercise, to recreate a restaurant dining situation that resembled having an open fire but recreated with lights:
We used a lantern that was positioned very high above the subject to cast a very soft light over them and then a redhead on a floor stand with an orange gel in front of it to resemble firelight.
To my surprise, it actually worked and It did (in the end) resemble firelight.
We tried many different positions such as which side the camera was to be on fireside or not and also how close or far the lantern was to the subjects.
(Photos Pending)
Sunday, 14 May 2017
Directing
Blocking
Light
Rehearse
Shoot
TV-style shoot
One was about shooting for TV coverage.. this is shooting a scene about three times
First, a wide shot covering all the action in the scene...

Then shooting close-ups of each character to capture their expressions.

The other way is to plan out a shot and cover all the action so there is no need for any editing.
This really inspired me when watching the end scene of Children of Men. that there was no obvious editing, and it made and it made for an amazingly immersive experience.
This really inspired me to think differently about shooting and my approach to any specific scene. both in the way to shoot quickly with TV coverage. but also trying to capture the action with one shot in a creative way.
Light
Rehearse
Shoot
TV-style shoot
- Wide
- Close-up 1
- Close-up 2
One was about shooting for TV coverage.. this is shooting a scene about three times
First, a wide shot covering all the action in the scene...
Then shooting close-ups of each character to capture their expressions.
The other way is to plan out a shot and cover all the action so there is no need for any editing.
This really inspired me when watching the end scene of Children of Men. that there was no obvious editing, and it made and it made for an amazingly immersive experience.
This really inspired me to think differently about shooting and my approach to any specific scene. both in the way to shoot quickly with TV coverage. but also trying to capture the action with one shot in a creative way.
Sunday, 30 April 2017
Film Noir self evaluation
All in all, I thought the Genre Film shooting went very well, we were efficient and fast at shooting (relatively) it only took about 4 hours all up. I thought the location was great for the film and We all did a good Job.
A couple of things I would improve on is reframing some of the shots, adding another fill light (Now I learnt how to use them properly) just to not let the shadows fall completely into black.
One thing I really learnt was how bad the crop factor is on the BMCC. The Some of the desired shots we were unable to achieve because of the narrow angle of the lens. However, I really liked shooting on the black magic apart from that and also the files size of the RAW format are unmanageable so I didn't shoot in RAW.
the other thing I learnt was to check properly the shutter angle!!!!!!!!!!! someone had left the camera set at 90º and I forgot to check until halfway through the film. (good thing there was no grain with the higher ISO)
Lighting Ratios & Inverse square law
Lighting ratios = difference between the key light and fill light
Intensity = 1/d²
These are achieved by distance, diff paper, flags, different lights, dimmer.
Through this exercise, I really felt I learnt how to manipulate light in a cinematic way to get the result I wanted.
the below example is a lighting ratio of 8:1 this was measured on a light meter using an incidental reading using a lumi disk for the key light and the fill (reflector board)

Film Noir Shooting


Wednesday, 5 April 2017
Lens Mounts
Lens mounts:
EF mount: developed by cannon:

F mount: developed by Nikon, used by F3 camera at SIT

PL mount: developed by Arri PL stands for positive lock. has advantage of strength for more weight.

Frame size:

Full Frame 35mm
Super 35mm equivalent to APSC-C (crop)
Micro 4/3
ABELCINE.COM/FOV
EF mount: developed by cannon:
F mount: developed by Nikon, used by F3 camera at SIT
PL mount: developed by Arri PL stands for positive lock. has advantage of strength for more weight.

Frame size:

Full Frame 35mm
Super 35mm equivalent to APSC-C (crop)
Micro 4/3
ABELCINE.COM/FOV
Wednesday, 29 March 2017
Light meters
Light metering
Reflective:
Measures reflected light from the subject from a light source.
Lumi-grid: used for reflective metering. near the camera.
IS inbuilt light meter in camera.
Incidental:
Takes a reading of light intensity.
Lumi-Sphere - used to measure light overall near the subject
Lumi-disk - Used for measuring strengths of individual lights.
Spot:
reflective metering principals but the angle of view is very narrow.
Lightmeter uses measurements of Foot Candles.
Light meter test:
For the WS I exposed from what the Incidental Lightmeter was saying exactly for the scene:
This was good overall but was not good for exposing the face.
For the MCU I over exposed by one stop so the skin tones were sitting in Zone VI. this worked really well.
Zone System
The scale between pure Black and Pure White.
Pure Black
Middle grey
Pure White
Zone system is divided into 11 zones the distance between the zones is one stop and one exposure value:
Zone 0 Pure Black
Zone I
Zone II
Zone III
Zone IV
Zone V Middle Grey
Zone VI
Zone VII
Zone VIII
Zone IX
Zone X: Pure white
1 Exposure Value:
One F-stop for appirtue
Half or double the shutter speed
Half or double the ISO

Film Noir
- American film style from 1940’s & 50’s
- Influenced by German expressionism (use of hard light/shadows etc.)
- Detective, thriller, murder mystery films.
- Film Noir Influenced many modern films such as, The Dark Knight (2008), Watchmen (2009), and Sin City (2005)
Some framing techniques that are used in Film Noir:
High Angles:
Give a feeling of loneliness,
minority and exposure.
Low Angles:
Help emphasise authority our superiorness
Dutch Tilts:
- Give a feeling of uneasiness, disorientation, and confusion.

- Moving from object to object to help viewer get into the mindset of hero
- Pan shots, Diagonal Pan, tilt shots very common.
- Moving the camera in ways that enhance the dark mood.
- Lot of character tracking shots. Use of dolly.
Colour
- Film Noir is monochrome
- has hard blacks and strong whites
- High contrast image
Lighting
- One key light with an optional fill light often a simple reflector.
- Came from chiaroscuro painting style (Renaissance period)
- High lighting ratio (high contrast).
- Provokes strong emotions for the viewer.
- Use of patterned shadows and silhouette
- Use of Smoke

- Wide Lenses (Around 17-55mm)
- Small Aperture
Wednesday, 15 March 2017
Psychology of camera
How to enhance feeling/emotion
Framing subjects
looking room and head room, giving emotion to the picture.
Creating expectation.
No looking room?
Space above the head?
excessive background?
excessive foreground?
Contrast subject with elements of frame
Boxing subject into the frame with elements.
Two subjects shot, reverse shot wide lens Long lens comparison
inside or outside the circle of communion:
Hand Held - uneasy, panic, stressful, urgency
Tripod - steadiness, calm, security, power
Movement
Dolly in/push in - highlights importance, revelations.
Dolly out/pull out - Leaving the scene, closure, isolation, distanciation.
Camera Height
Above subject disempowers talent.
Below subject empowers talent giving authority.
(Camera movement tutorial)
Shutter angle
Fast shutter - 90deg - crisp images - heightens sensors
Story Boards
Storyboard purpose:
To plan out shots, sequencing, give ideas about framing, composition, camera movement, lens, idea of locations, pictorial representation of the story/naritive.
When to use a stroy board?
CGI, VFX, Animation, action sequences, TV commercials, short films.


To plan out shots, sequencing, give ideas about framing, composition, camera movement, lens, idea of locations, pictorial representation of the story/naritive.
When to use a stroy board?
CGI, VFX, Animation, action sequences, TV commercials, short films.
Subscribe to:
Comments (Atom)